Whenever you’re zipping around town, fast approaching an intersection, or biking down a hill, your brakes can literally make the difference between life and death. Brake pads are those key components within your brakes that apply the actual force that brings you to a halt.
Most brake pads last around 1,000 miles. However, if you’re cycling on rough terrain and wet roads, the pads may need replacement within 700-800 miles. Metallic and ceramic brake pads last the longest at 800-1,000 mi. Organic pads offer better braking ability, but they wear out within 500-700 mi.
In this article, we’ll cover how different cycling conditions affect your brakes, the lifespan of brake pads and provide valuable tips on how to change brake pads when they’re worn out.
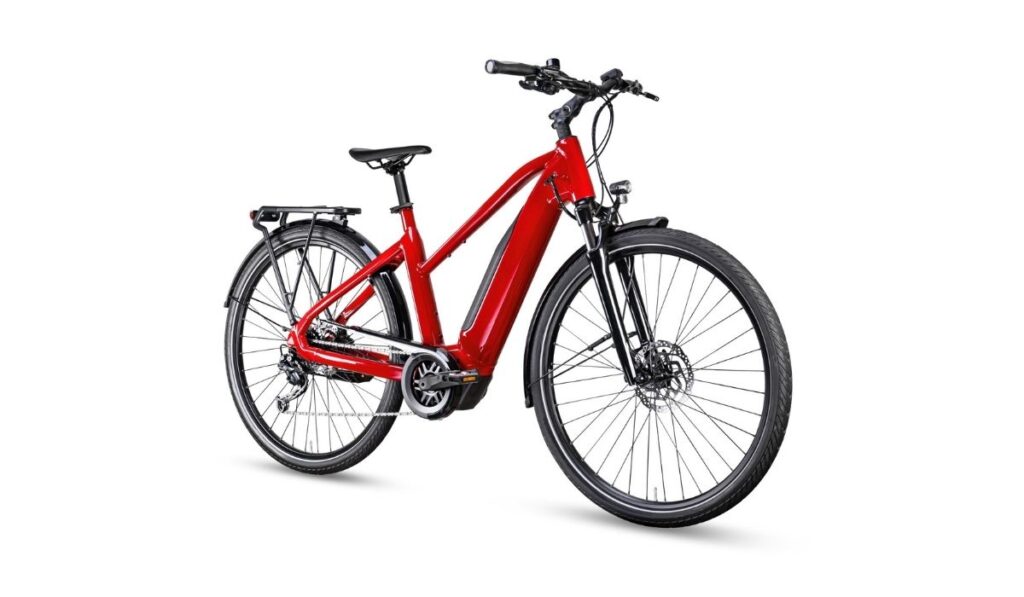
Do Brake Pads Wear Out Faster on E-Bikes than on Traditional Bikes?
It’s understandable why people think e-bike pads wear out quicker since they’re faster. In reality, speed doesn’t affect brake pads as much as other factors like terrain and weather conditions.
Whether you’re using a traditional bike or an electric bike, if you’re riding in wet areas, steep hills, or in a city full of traffic, your brake pads will wear out fast. That’s because you’ll need to apply your brakes frequently, and it will take a toll on your brake pads eventually.
Similarly, the more distance you’re covering, the more frequent brake use and the more wear and tear you’re putting on the pads.
So, if you need to replace your e-bike pads more often, it’s because you are covering more distance than traditional bikes. Otherwise, the life span of e-bike and regular bike brake pads is pretty much the same.
How Long do E-Bike Brake Pads Last?
Generally speaking, if you bike on a regular trail or under normal conditions, the pads should last for between 500-1,000 miles. Then again, if you are a city rider and need to brake frequently, 400-800 miles might be more realistic.
But you should know determining a specific brake pad’s lifespan is much more art than science. Take an example like the Hyacinth 4PC brake pad set (on Amazon): notice how this product doesn’t specify a lifespan directly, instead describing “how many times the brake pad can be used continuously” and specifying strange parameters like “4,000 miles on smooth [roads]” but “1,000 on steep hills.”
The truth is, both the speed, cargo weight, bike weight, hills…all of it has an effect on a brake pad’s lifespan, so you should change them early and often as soon as you notice poor braking at all, not at a specific mileage.
Let’s go through a few important factors that significantly affect the life span of brake pads.
1. Brake Compounds
A brake compound is the material that makes the brake part of pads that touch the tire or wheel rotor. This 2-5 mm thick layer sustains the friction and absorbs the heat generated due to friction. The compound is made up of either metal, ceramics, or organic substances.
Each type has different features and lifespan.
Metallic/Sintered: These are the most durable brake pads. They can withstand extreme weather and last more than 1,000 miles. However, metallic pads tend to be too noisy, especially towards the end of their life.
Organic: Organic pads are made of resin, bound with rubber and silica. They are the most efficient pads on the market and can give you the sharpest brakes. They’re quiet and cost-efficient, but unfortunately, organic pads wear out a lot faster than other compounds.
The usual lifespan of organic pads is between 500-700 miles. They don’t work best in hot climates or wet areas either.
Ceramic: Made up of ceramic fiber, these pads are highly heat resistant and last around 800-1000 miles. Ceramic pads stand out because they are as quiet as an organic compound and stay safe even towards the end of their lifespan. Right now, ceramic pads are the most expensive kind on the market.
Semi-metallic: These are a combination of metallic and organic compounds. Metal shards add to longevity, while organic components contribute to their effectiveness.
They can endure harsh weather conditions and are considerably less noisy than metallic pads. Semi-metallic pads last the longest-lasting type, around 1000-1250 miles.
Most modern brake pads contain both ceramic and semi-metallic compounds; these advanced materials give both good resistance to heat and increase life span.
2. Weather Conditions
Extreme weather conditions are hard on bike pads. Cold weather hardens the brake compound and degrades hydraulic oil.
On the other hand, brake pads lose effectiveness and heat up under blazing hot sun and desert roads. In both cases, they wear down much faster.
3. Usage
Frequent brake usage will reduce the life span of your pads. If you are a biker who likes to slow down frequently, then you’re putting more stress on the pad than someone who rides at lower speeds and uses brakes only when needed.
Are Rim or Disc brakes more common? (And what’s the Difference?)
Both types of brake pads are commonly found on e-bikes. However, most e-bikes nowadays come with disc brakes. They are more efficient and offer better performance. They both work differently and have their own pros and cons. Let’s break down these two types of brake pads.
Rim Brakes
This traditional brake system consists of brake pads attached with calipers mounted on the outer rim of the tire. When you apply the brakes, the calipers press pads against the wheel rim and decelerate the bike through friction.
Here are some facts about rim brakes:
Pros
- Rim brakes are cheaper and easier to repair.
Cons
- Any debris, mud, or water that gets stuck between pad and rim can cause brakes to fail.
- Rim brakes need a lot of hand force to stop a bike.
- They can damage the bike rim due to excessive pressure.
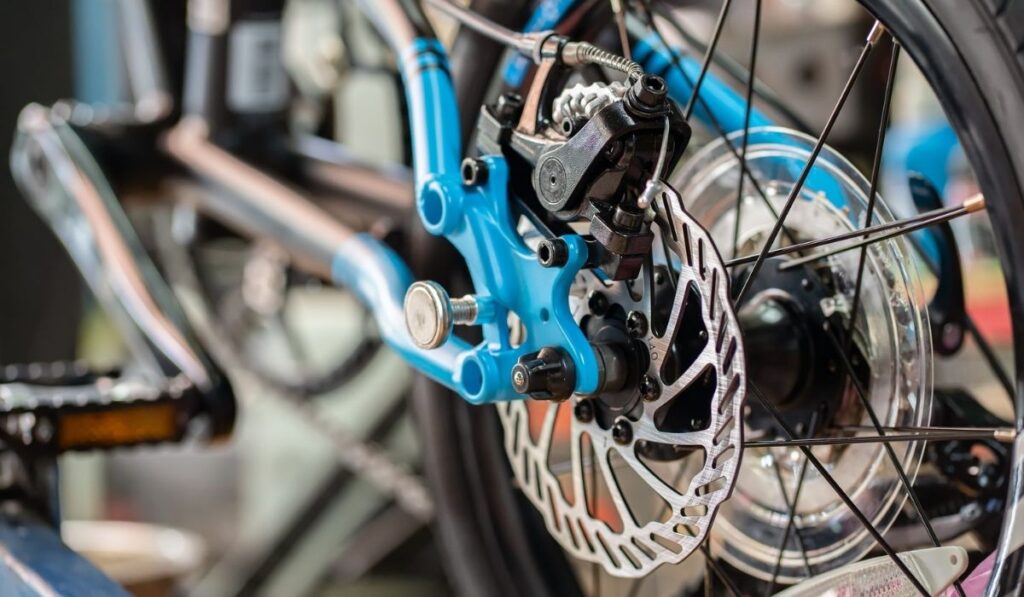
Disc Brakes
In the disc brake system, the brake pads and caliper are attached to a rotor in the wheel hub. When you apply the brake, the rotor is squeezed between two pads and slows the wheel down.
There are two types of disc brakes: mechanical and hydraulic. Both types have the same basic structure, and their difference lies in their cables. Hydraulic brake cables are filled with fluid.
Pros
- Because they’re placed in the middle of the wheel rim, disc brakes aren’t susceptible to mud or water, so they are efficient in all conditions.
- They use less hand force for stopping and provide better braking control in both wet and dry conditions.
- Since they have a large surface area and better contact with the wheel, disc brakes last longer than rim brake pads.
Cons
- This is a more complicated system, so they’re more expensive.
- It’s a little challenging to replace brake pads on disc brakes if you are a do-it-yourself type of biker.
How do You Change Your Brake Pads?
A few basic tools and a little technical know-how are all you need to change your brake pads. The whole process only takes about 15 minutes, and you’ll have brand new brake pads on your wheels.
Changing Pads for Rim Brakes
- The process starts with removing the worn-out brake pads. To get to them, you’ll need to unmount the wheel. For the rear wheel, shift the gear into the smallest cog, release the skewer, and remove the wheel.
- Once the wheel is off the bike, use a flat head screwdriver or a needle nose pliers to loosen one or two grub screws that hold brake pads with carrier shoes and calipers. Then, unbolt just enough to slide off the worn-out pads.
- Slide the old brake pads toward the back, use a plier or screwdriver if the pads are stuck with their carrier. Wipe the carrier clean of dust and dirt.
- Now, slide the new brake pads into the carrier following the direction arrows. Left and right side pads are different, so make sure you put in the right one.
- Put back the grub screw or use a new one if available. Then tighten the grub screws until the new brake pad holder is locked in its place. Next, thread the washers and screw along with the pad carriers into their slots on the caliper.
- Refit wheel back to bike frame and tighten skewer nut. Fix the brake pad assembly and secure it with mounting screws. Ensure that both pads are evenly in contact with the rim and the center is aligned.
- Test the brakes by spinning the wheel and also check by releasing the lever. If you feel the brakes are not responding well, take off the brake pads and re-adjust them.
Steps for Changing Disc Brake Pads
- Loosen the thru-axle holding the brake rotor with the hub, slide the axle out of the dropouts and remove the wheel. If your disc brakes have a quick-release axle, you can simply loosen and take off the brake rotor by pushing a button.
- Carefully examine the brake rotor for any metal-to-metal contact damage. If there is any, you’ll need to change the rotor too.
- Now remove any screws holding the pads in place and then take off the old brake pads by pushing with the help of a flat head screwdriver or pliers.
- If you have a degreaser, it’s a good time to clean the rotor and caliper assembly while you have it off the bike.
- Now slide in your new pads and tighten the screws back in place, but not too tight.
- Mount the wheel back onto the bike and tighten the thru-axle. Make sure the rotor is parallel and center to the calipers.
- Test out the brakes by spinning wheels and pressing the levers. If brake pads can grip on the rotor, you are good to go.
Replacement brake pads can be found at most bike shops or online from Amazon. The Aurora Ceramic (on Amazon) rim brake pad set is a good option for replacing carbon wheel rim brakes.
These pads can fit with Shimano or SRAM calipers and feature ceramic compounds that provide good stopping power for mountain or high-performance bikes. Shimano (on Amazon) rim brake pads are also great for replacing aluminum rims. These simple sets should fix in your Shimano Ace calipers like a glove.
For disc brake, you can get the Shimano resin brake pads (On amazon) or KREMORV resin pads (on Amazon), which are compatible with the Shimano Deore XT, M601, T605, M975, and many others models. These resin brake pads are easy to fit and have good durability.
How Do You Know When To Replace Your E-Bike’s Brakepads?
There are a few methods for determining when it is time to replace your e-bike’s brake pads.
The most reliable method is to give a visual inspection, and it’s a good idea to examine brake pads every 500 km. Rim pads come with wear indicators in the form of patterns or grooves. If these grooves have been ragged down, it’s time to replace them.
New disc brakes start with a 3-4 mm thick layer of the compound; when this layer is worn down to 1 mm, it’s time for a replacement. You can compare the disc brake compound thickness with a credit card; if compound layer is thinner than the card, you should replace the pads.
Worn-out pads can’t grip the rotor as well, necessitating more force to come to a stop, which is also a typical indication that it’s time for new brake pads. Constant squealing or scratching sound from brakes is also a sign that you need to replace pads.
How Much Do New Brake Pads for an E-Bike Cost?
Rim brake pads usually cost between $5-10 per set, while high-end like SRAM or Shimano replacement can cost up to $20 each.
Disc brake pads can cost as low as $20 for regular resin replacement to as high as $60 for ceramic ones.
If your bike shows any sign of brake pad wear, give a checkup immediately. Pad wear is easy to spot; make sure you replace brake pads before they are completely gone, and your rotor gets damaged due to metal contact.
You can save yourself from expensive repair just by replacing pads at the right time. If you need more information on e-bikes brake pads, check out this post with step by step guide.